Pattern Making the Barong Dress
I started the collection with the Barong dress as it is the most familiar and I know the parts that needs to go. It’s the one in which the design is finalized and will only be changed in details instead of the whole design.

I began pattern making for this garment using resources from Pattern Making for Fashion Design by Helen Joseph Armstrong, which has details of the shirt, collar, placket, and sleeve changes. Design lines where my own.
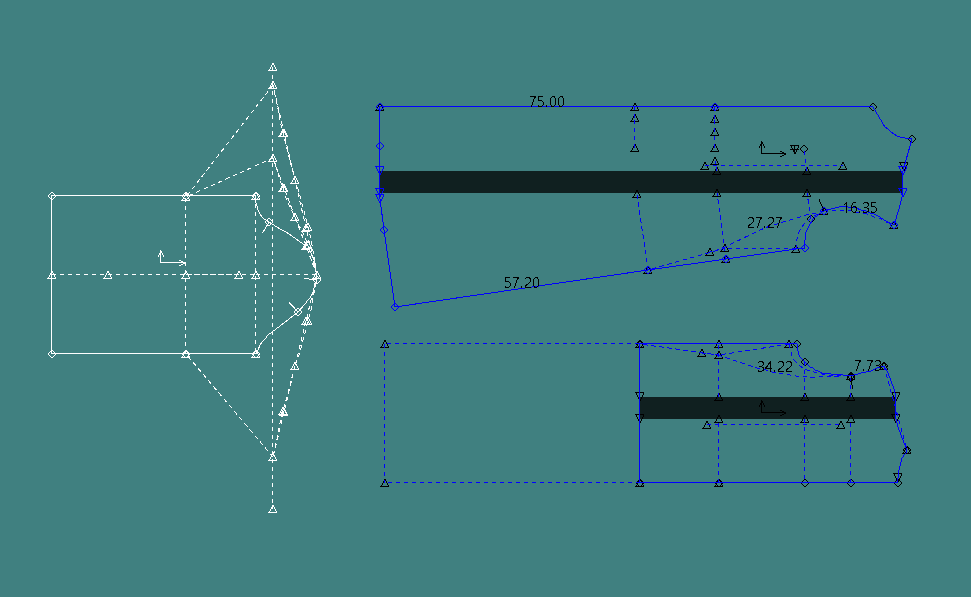
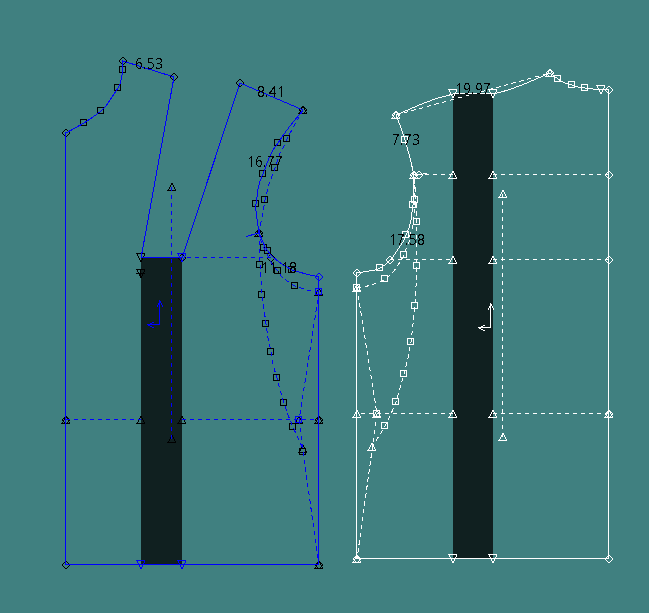
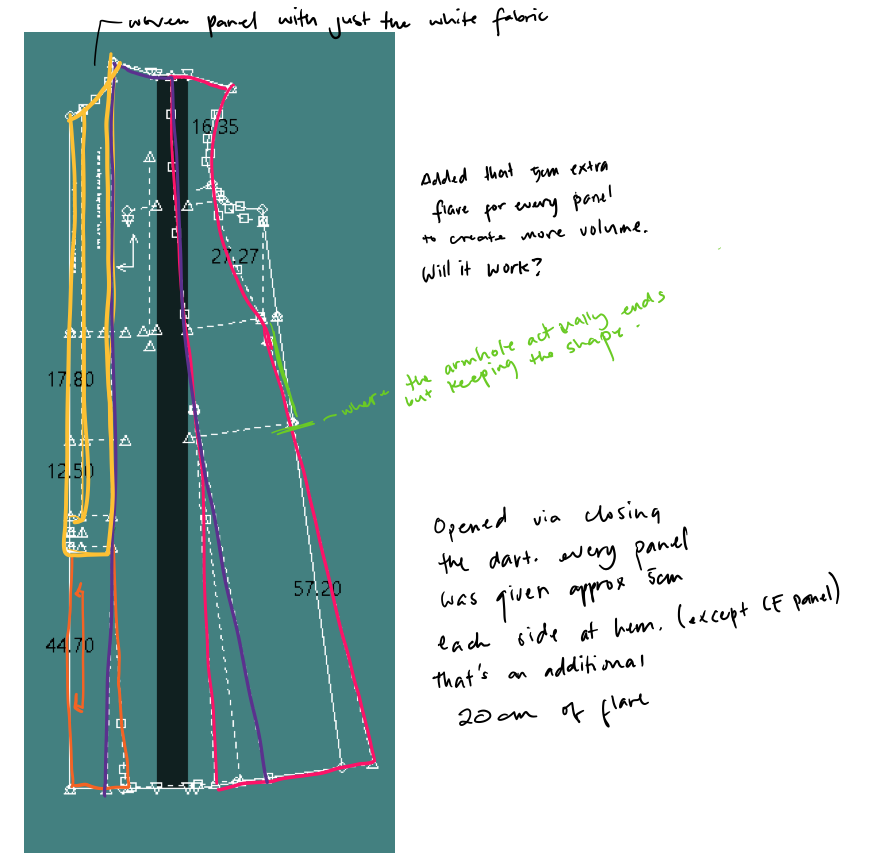
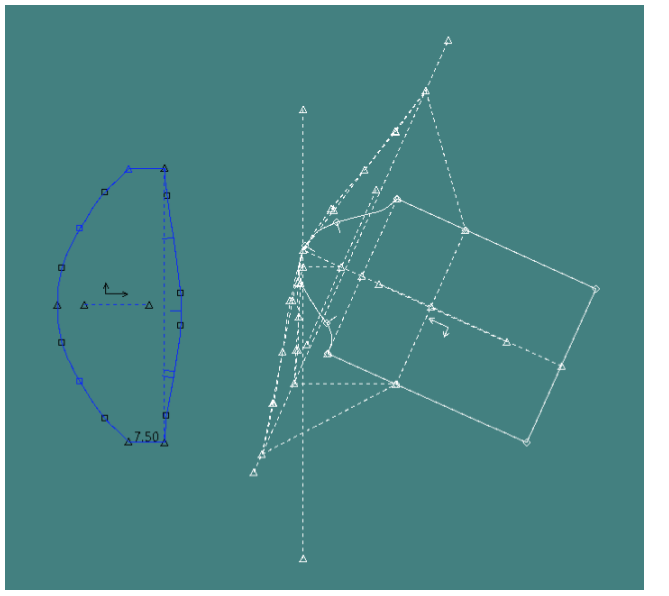
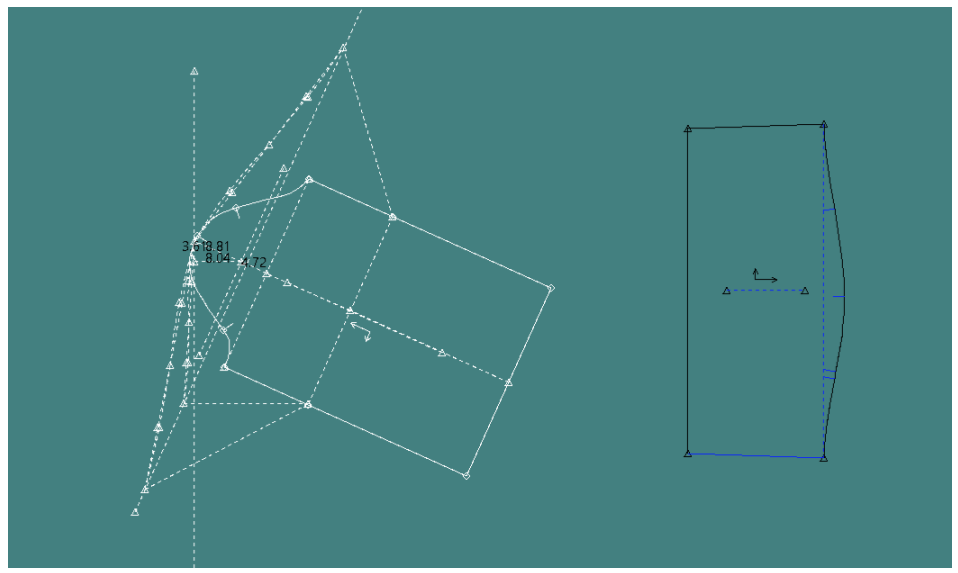
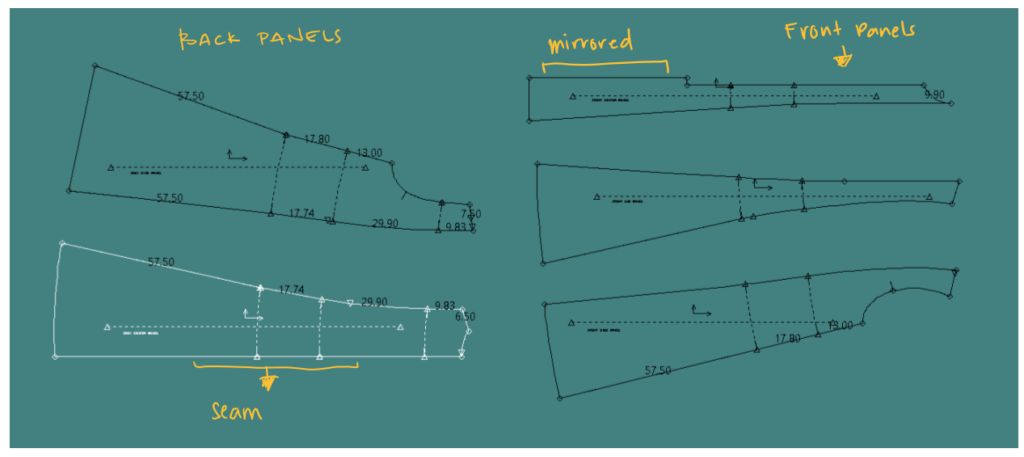
The master shows the manipulations I made with the tunic block which I drafted from a bodice block. I know there is a women’s blouse block that I could use to start. However, the books showed instructions from the darted bodice block. I think it may serve well to keep a bit of the waist shaping at side seam. I expect this to change if the shaping at the side seam is better straightened instead of keeping the shaping. I also added panel lines to force the triangular shape of the garment and hopefully achieve the look that it is away from the body. This is so there are fewer layers underneath. We shall see.
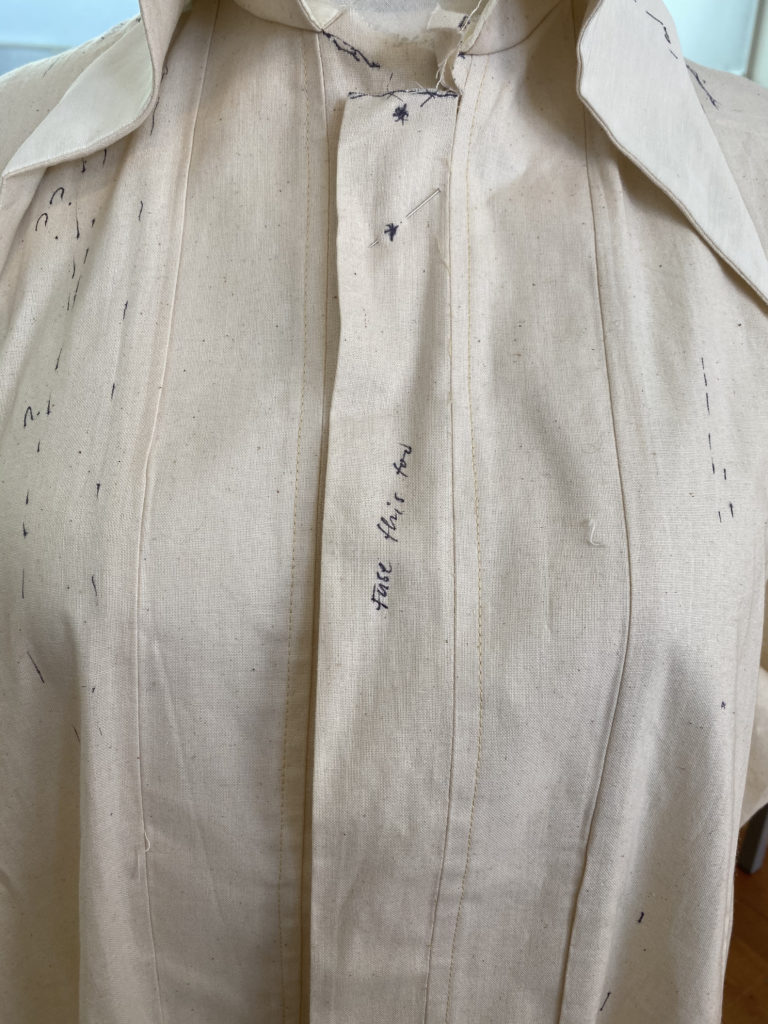
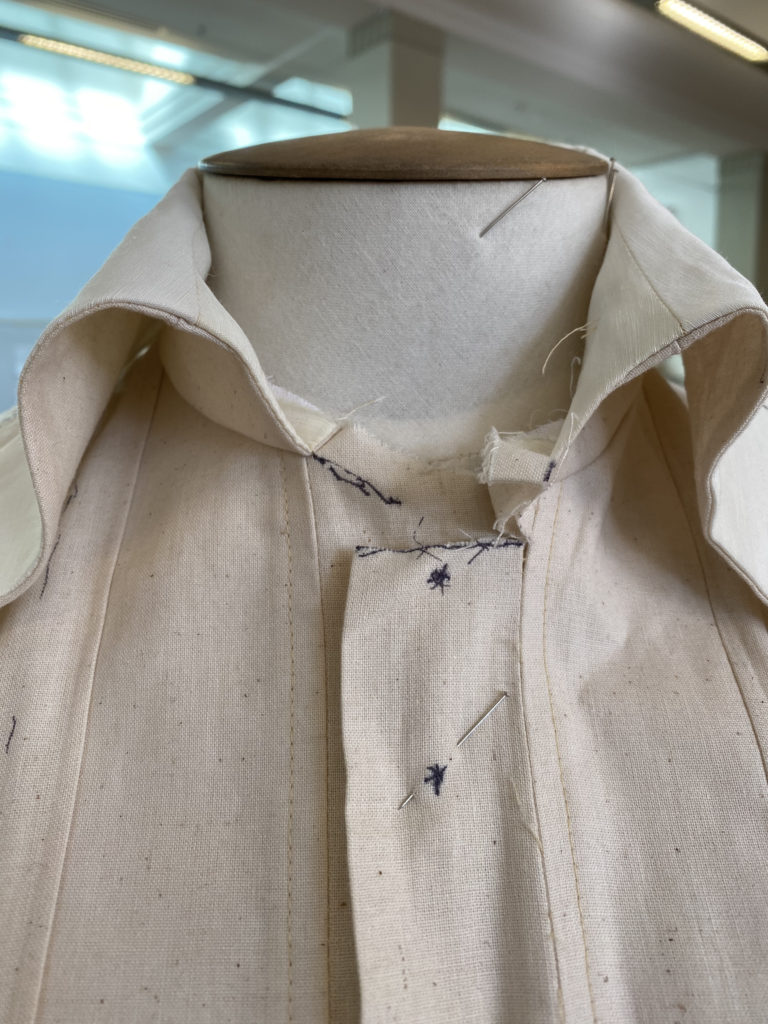
The placket was the most difficult to draft. I’ve only done this design once and I still haven’t wrapped my head around it. As I rarely design with buttons, this is not my area of familiarity. To be a little bit more precise, I looked into a traditional barong and how it’s made to understand the mechanics. I expect some changes in the pattern.
I was thinking of making the front where the pleat stands into a woven detail as well. It may tie in with the design of the first look. But I’m not sure because of the woven tapis that goes on top. It may not be needed.
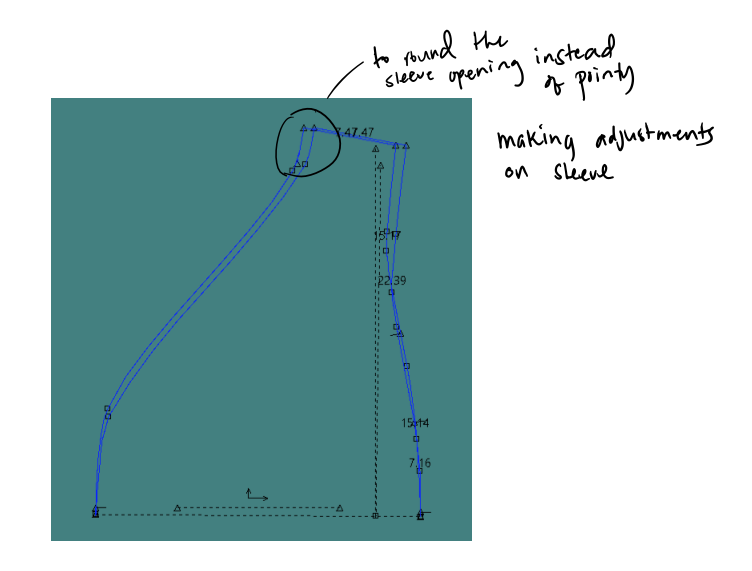
I was a little worried about the sleeves as the pattern looks so different. It did make sense, though, but I know I still have to see the toile to decide if it’s correct. Additionally, I looked closely at my sketch and tech drawing and realized I had the armhole opening designed to go past the waist. I have to see to know how I feel about such a big opening, it could be surprisingly good or just bad. I do like that the opening is exaggerated for this dress as it casualizes the formal barong.
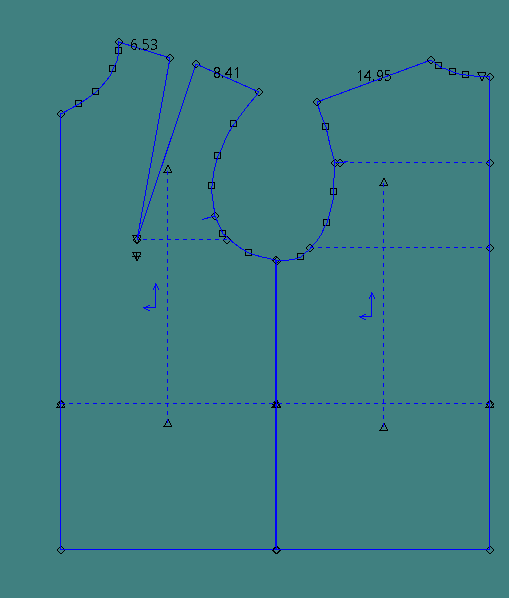
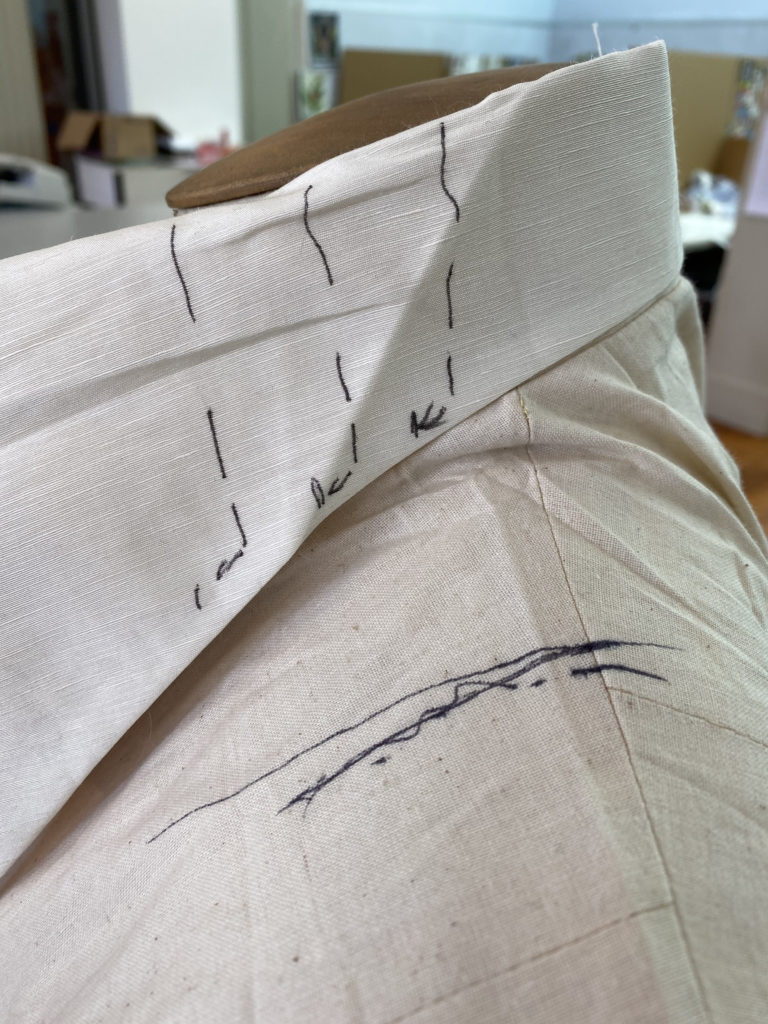
The collar was perhaps the easiest to draft. I started with a mandarin collar for the stand, then drafted the shape from there. I may have to open this up a bit for it to sit on the shoulders better. But will try this initial stage of the design.
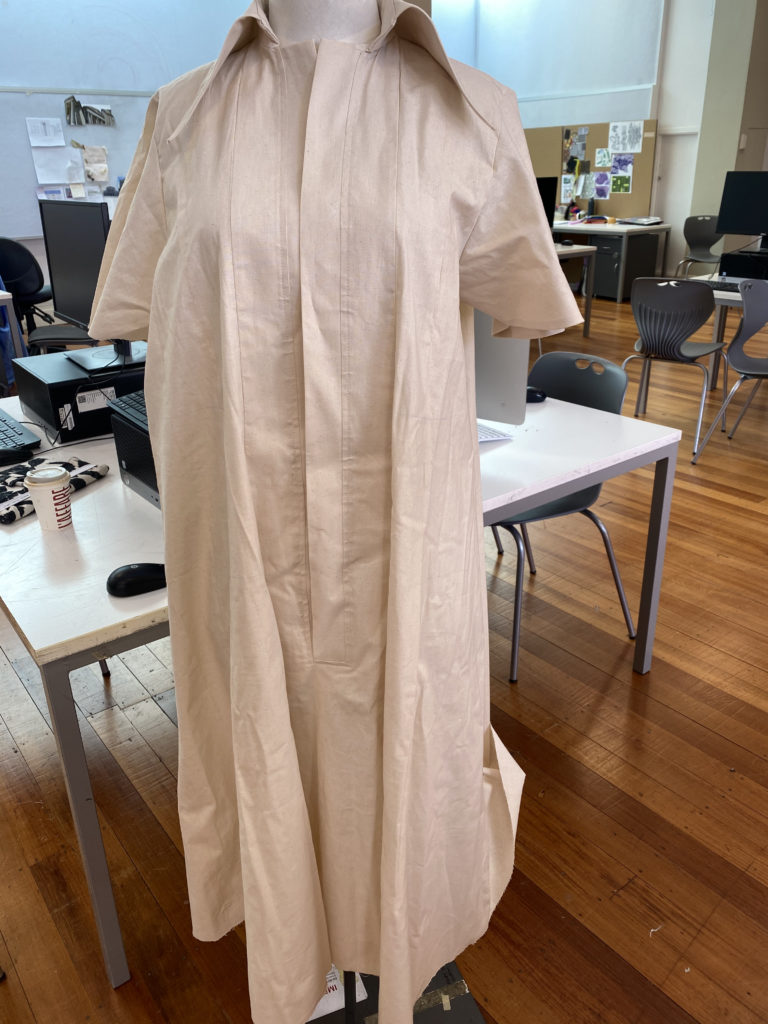
The first pattern draft was quite successful in the silhouette, length and volume of flare. I didn’t have to changed much in the regard, however the toile presented detailed mistakes that needs to be sort out for the final garment. These changes are mainly:
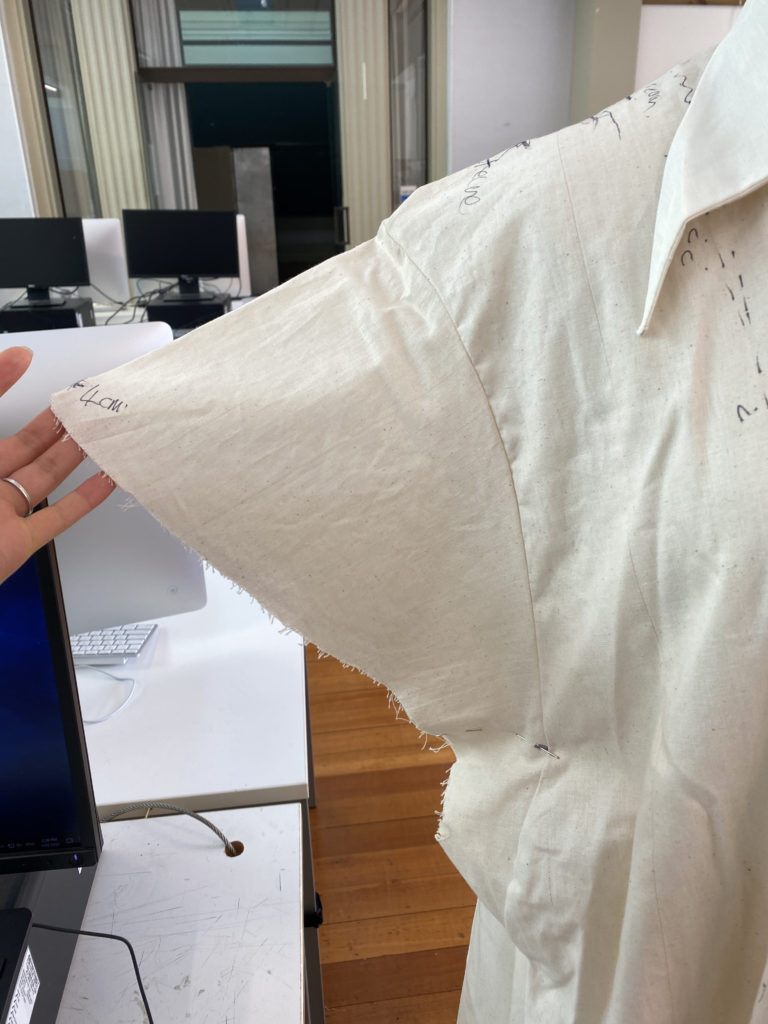
- Sleeves – it’s not the design I was aiming for. The design looks like a kimono, dolman style sleeve but set in. It didn’t have the wide open hem that I first imagined. It is also very low, as I had expected.
- Collar – not sitting smoothly. Collar needs to open a few centimeters at the edge to sit nicely on the shoulders. The stand is also being pulled by the collar. I have spoken to Robyn about this and it just needs to be redrafted slightly.
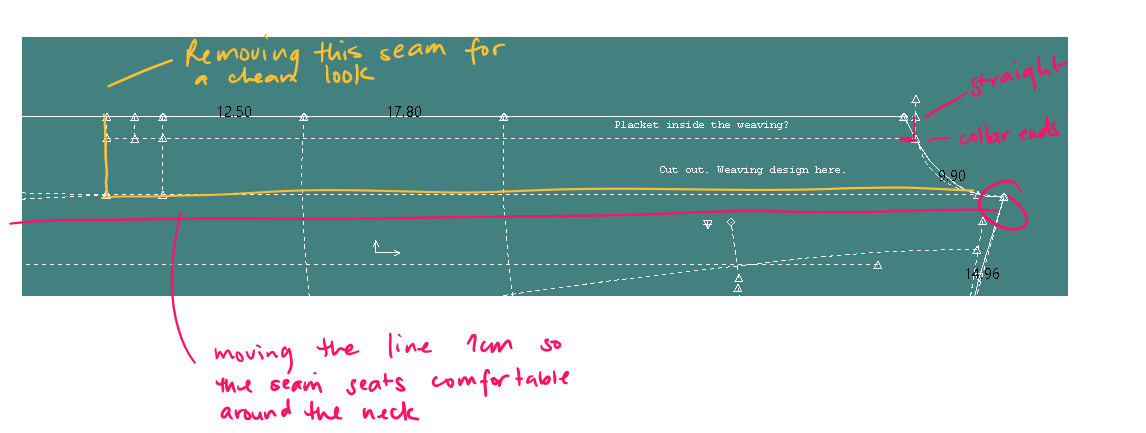
- Placket – it is working alright and well, except the construction sequence needs to be noted so as to make sure the top of the placket where it’s not connected to the collar is bagged and the collar seats comfortably while allowing a small opening at the center front.
- Seams – need to figure out a way to find raw edges without having to use an overlocker (because I don’t like the look of it, high end is what I’m hoping to achieve) or lining (not really the look I’m going for). I looked into the construction of a typical Barong and French seams seems to be a commong choice as the fabric is light weight and (most of the time) see-through. This may be my first choice.
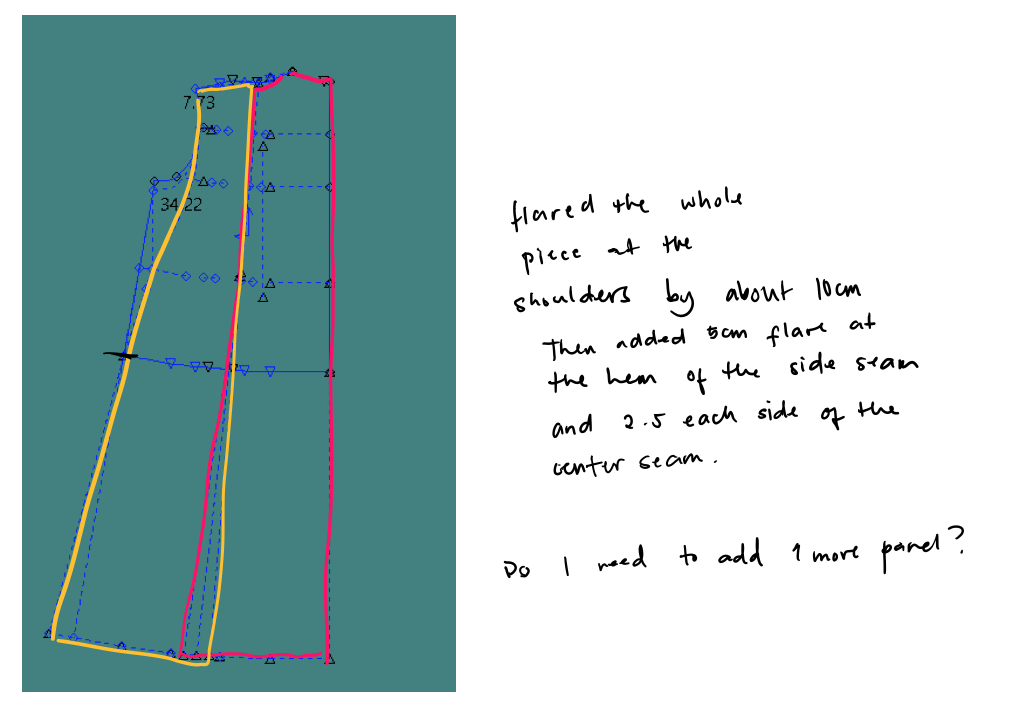
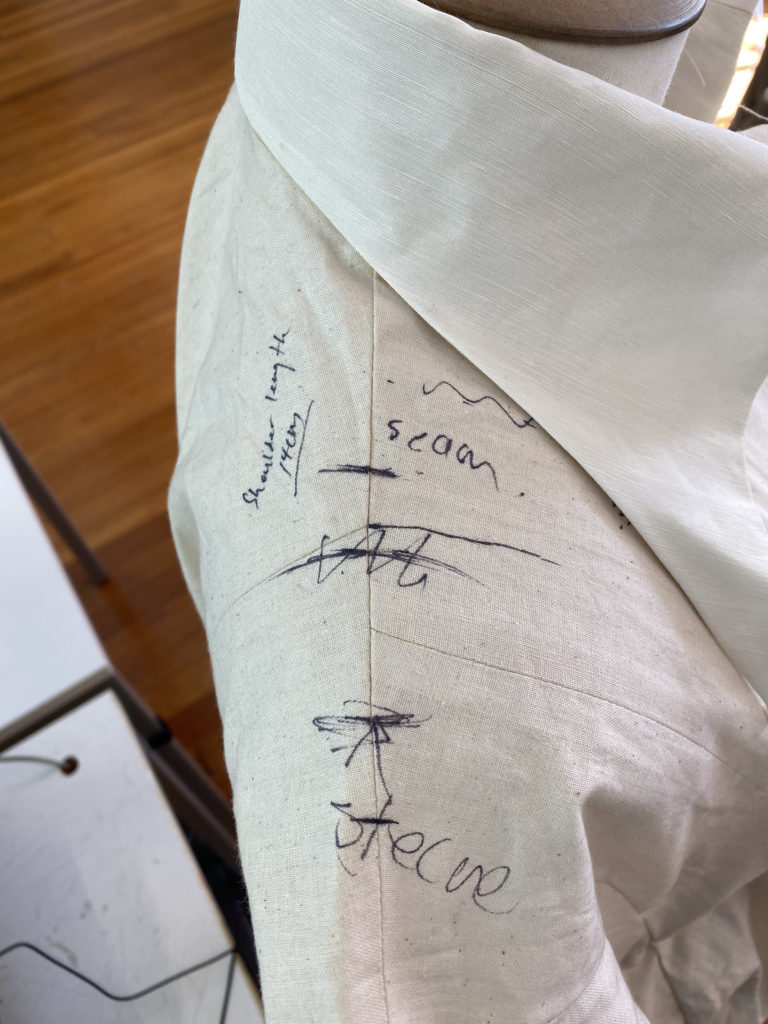
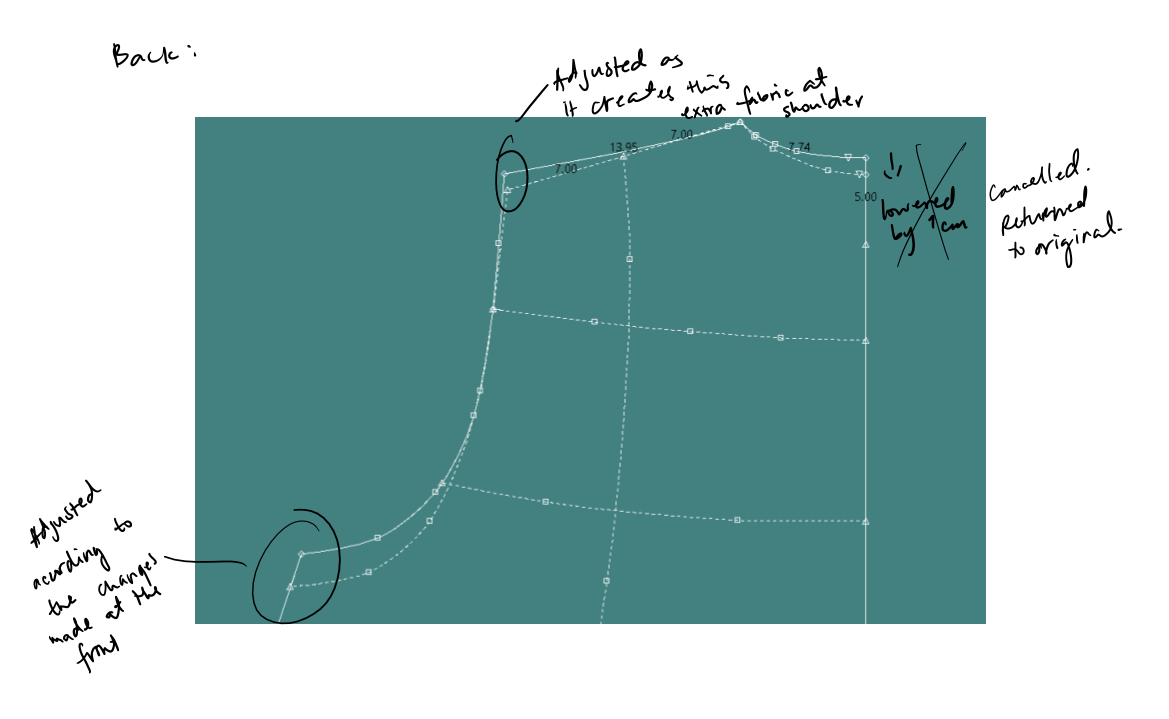
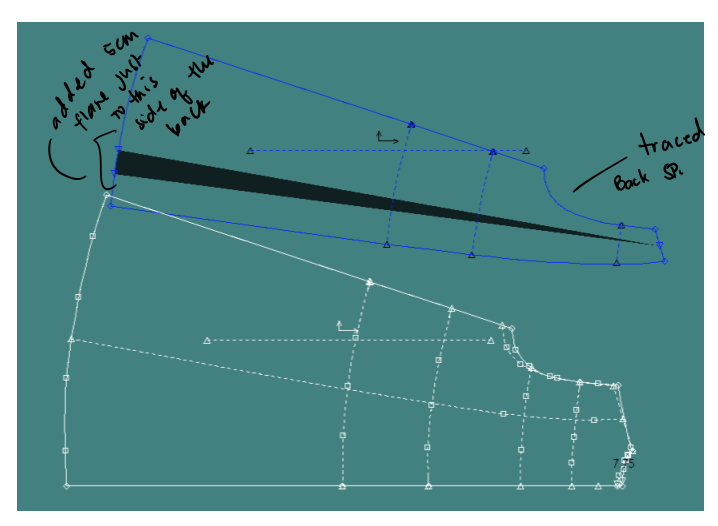
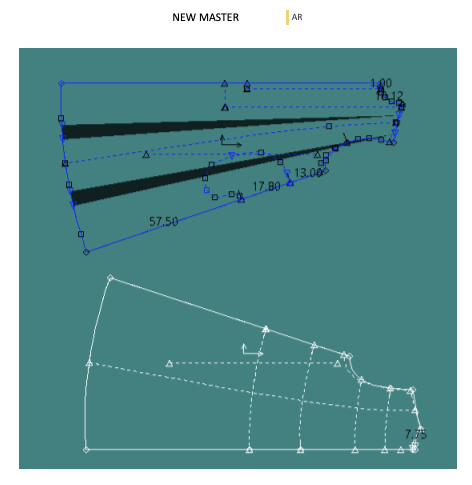
- Shoulders – I first designed this garment as an oversized shirt, so the first draft would show I opened the front and back by about 5cm on each side. However, as I had a talk with Sue, her suggestion was to set it back up to the original length. I may have to drop it a little more as I do like the dropped sleeve look – it has a more relaxed look.
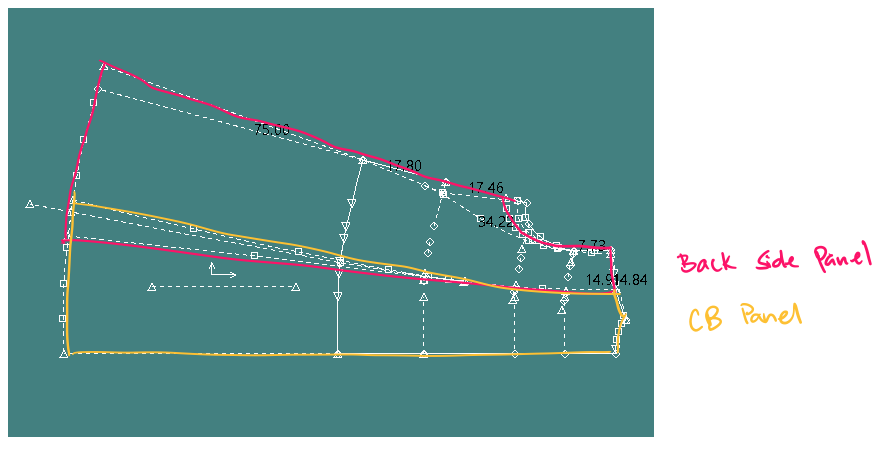
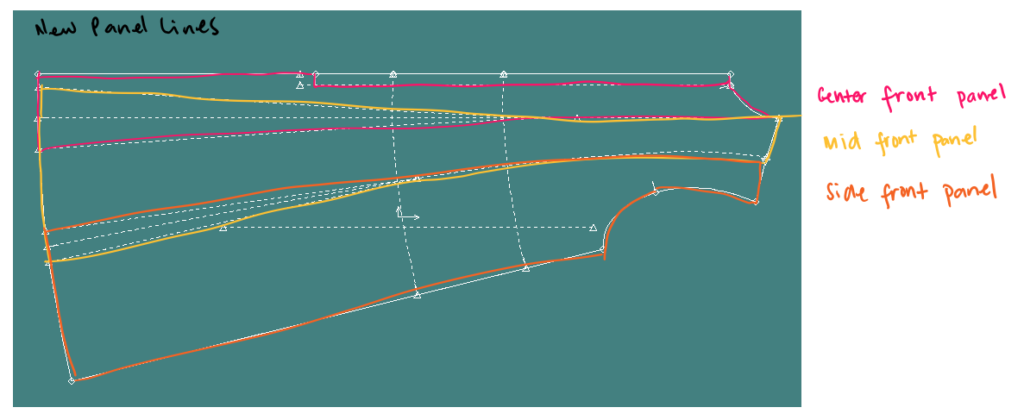
- Center Front Panel – i don’t know why I had to cut the placket part of the center front from the bottom bit. I realized it created unnecessary line at the bottom of the placket when it’s completely acceptable to have a single center front panel where the placket would be attached.

Making the changes
Applying all these changes the first time. This was done in August, and now writing this in October. So much has happened in between. I managed to take as many photos as I could along the way, and annotate what’s needed.
Removing excess drop shoulder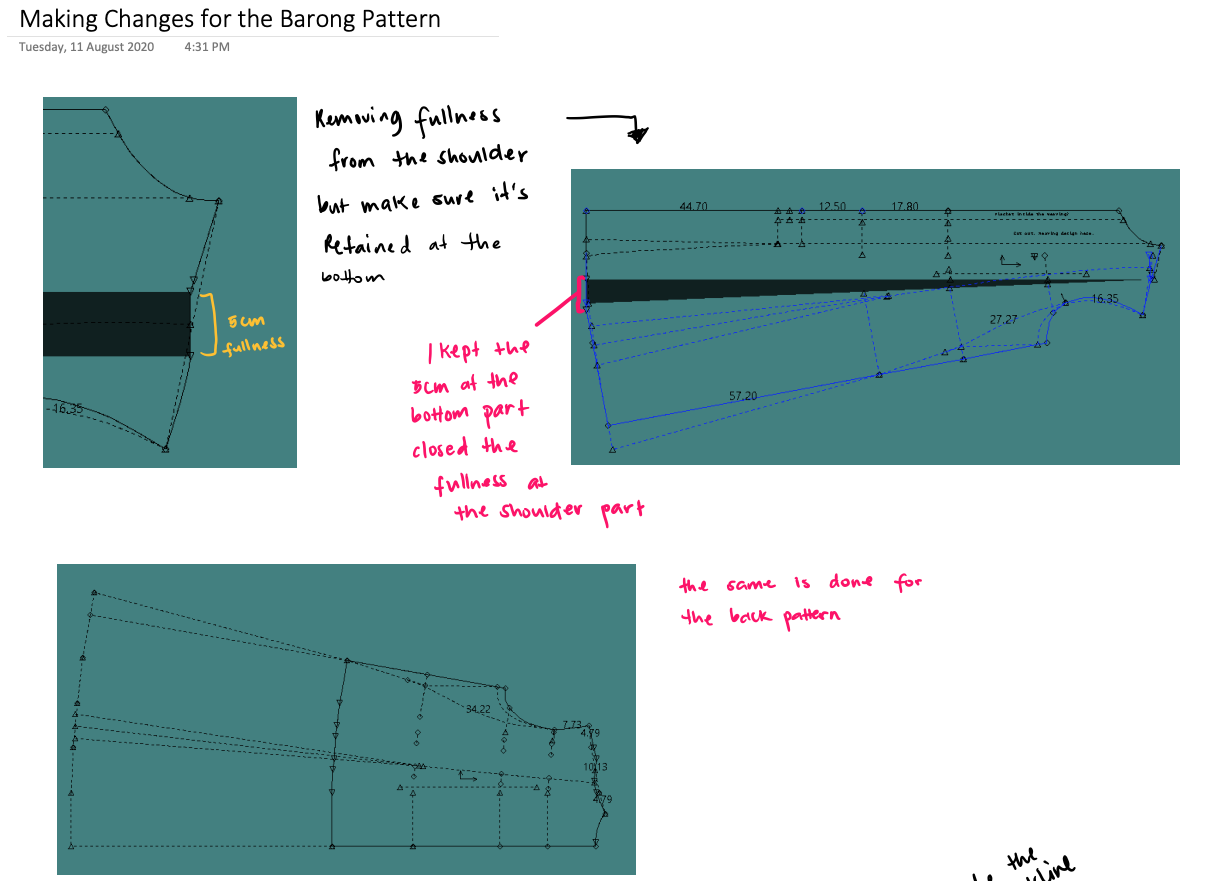


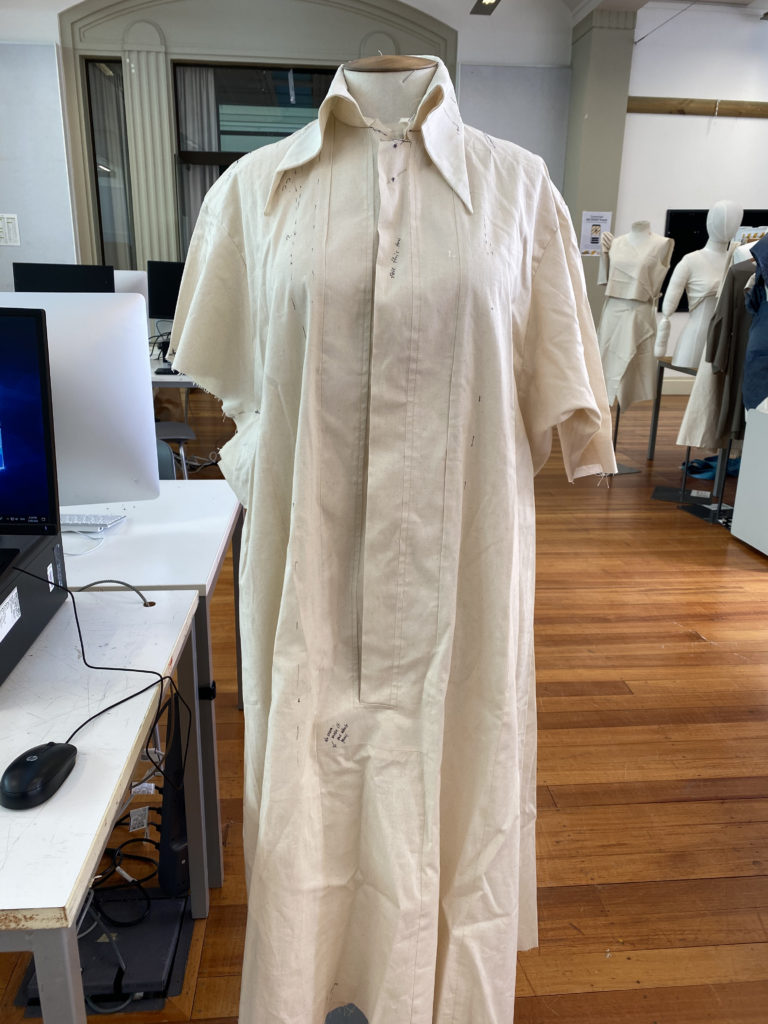
Final pieces made for second toiling

It was almost there. But I have pointed out to Robyn some mistakes I noticed and asked for help.
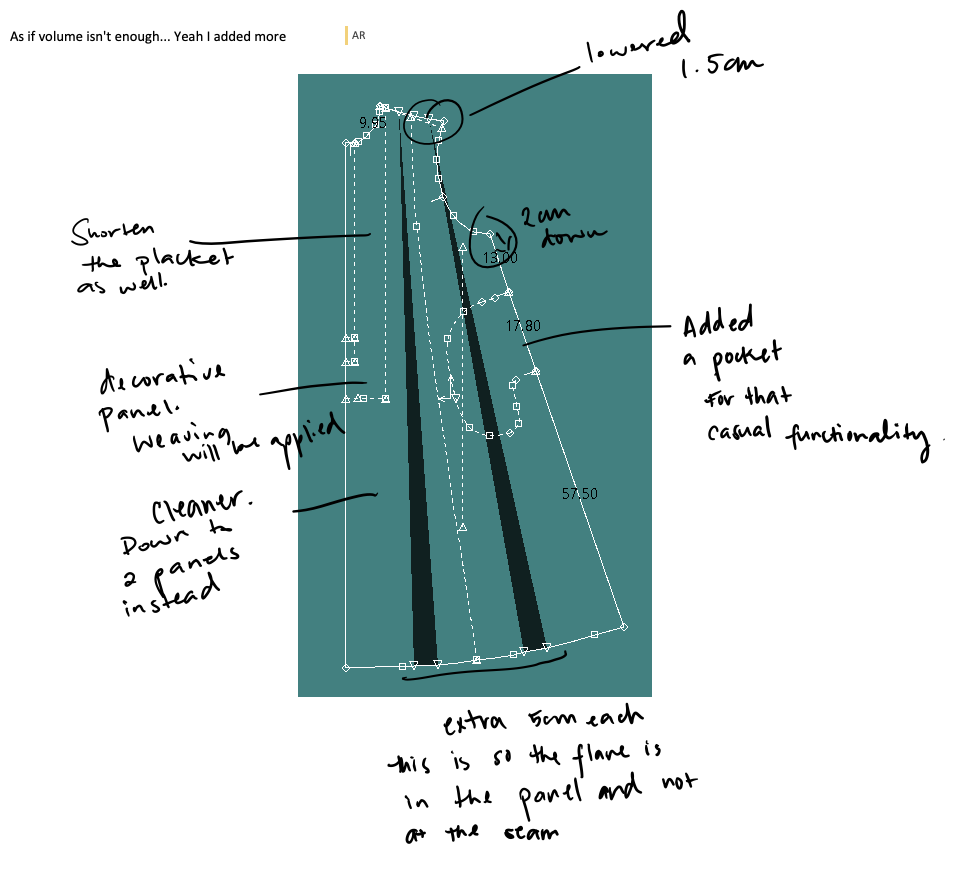
- Collar isn’t sitting right. I needed to lessen the volume at the collar to let it sit. (Turns out, I sewed it the wrong way around. I didn’t need to change the pattern much)
- Sleeve, although Robyn likes it and said I don’t need to change it, I wasn’t getting the correct feel.
- Placket, I decided to shorten it to a typical button up shirt length.
- Pocket! What’s a modern dress without pocket?
By this time, I was starting to get frustrated and I needed to do something new. Tried CLO3D for the first time and tutorials were straight forward. To try it out, I used the Barong design. It worked, so I kept going.
Third’s a charm?
To the cutting table and sewing machine, I went back because there were more changes, more alterations to be done. I needed this to work the most. The Terno dress was doing alright, I needed this to work as well. I applied the following changes for the third toile:

No image taken of the final garment, unfortunately. I think I wasn’t getting new results no matter how many changes I keep making. By this time, I was starting to get frustrated and I needed to do something new. Tried CLO3D for the first time and the tutorials were straight forward. To try it out, I used the Barong design, thinking that if the programme isn’t too difficult to learn, I could use it to my advantage. Gladly it was.
No Comments