More details about the changes for the Barong Dress on CAD
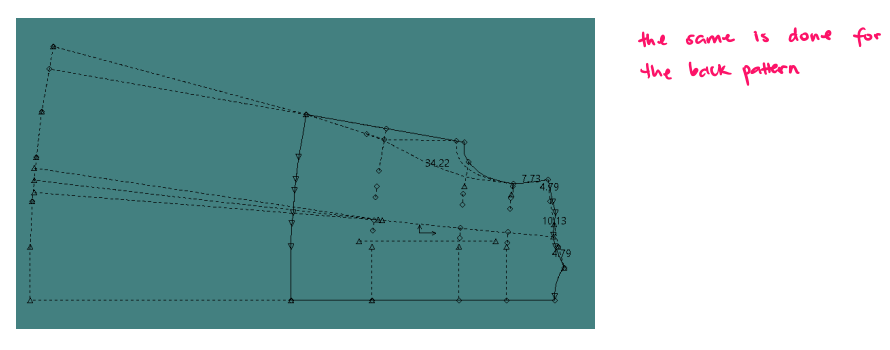
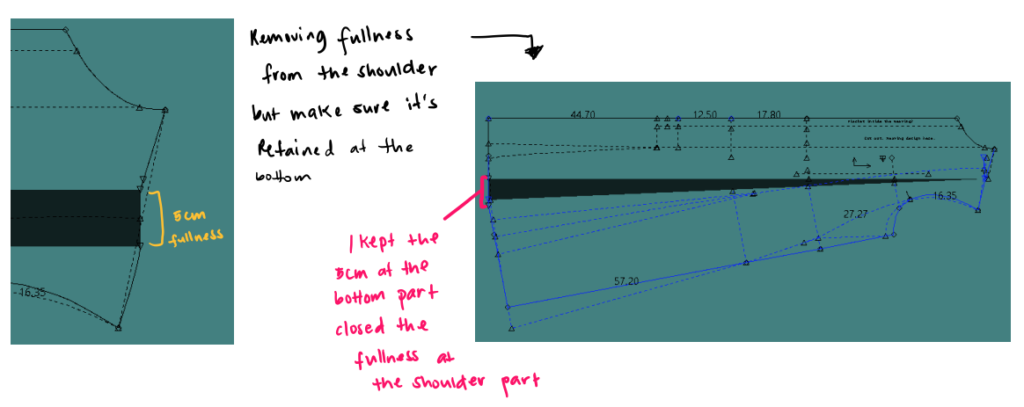
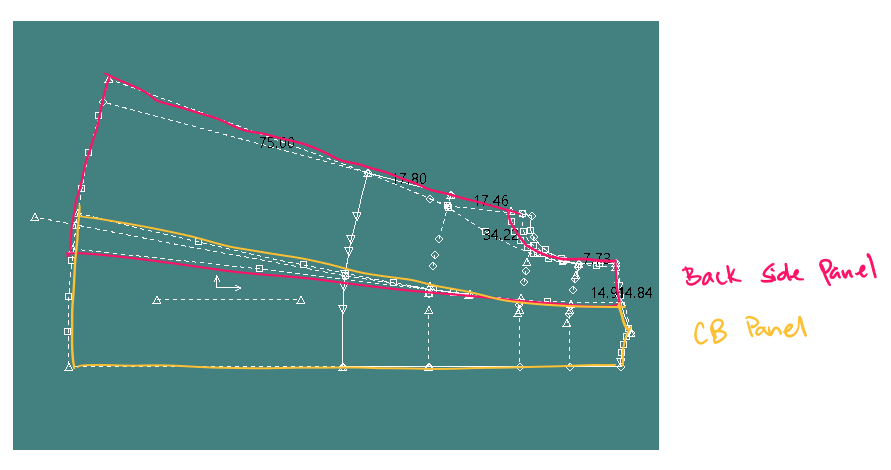
There were multiple changes made with the patterns of the Barong dress to finesse its look and details. I began by removing the fullness of the dress that made it oversize, but I kept the volume of the original pattern at the hem.
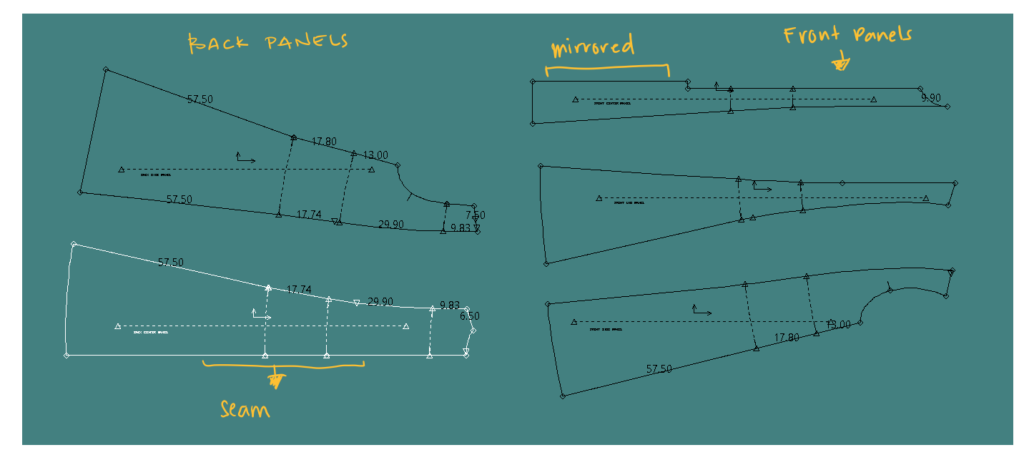
As mentioned previously, the center front panel doesn’t need a horizontal line to separate the placket from the rest of it. So I removed the seam to create one whole panel. I actually don’t know why I did it. I think it was so I could hide the raw edges of the facing, which wasn’t the best solution, anyway.

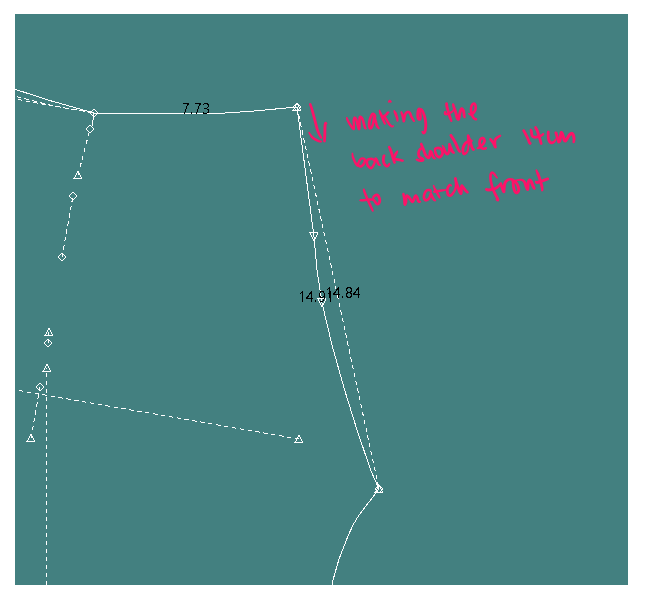
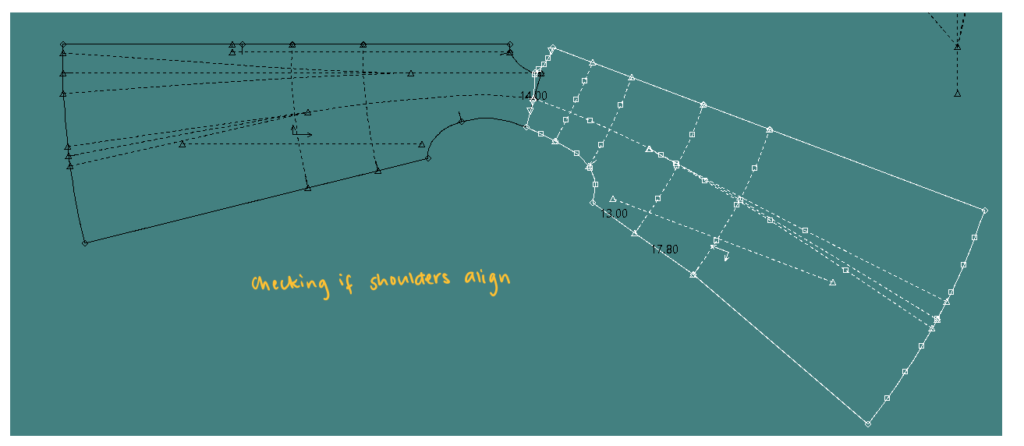
I wanted the collar to end at the seam where the placket begins and then straighten the placket from there. I moved the center panel line 1cm away from the neckline, however, I think I didn’t push through with this later on. The neckline was also reshaped to add space. After removing the fullness at the shoulder, the shoulder went back to it original length and rounded it off to 14. The toile marks show 12.5cm length, however, I decided to keep the length at 14cm to have it look less tailored.

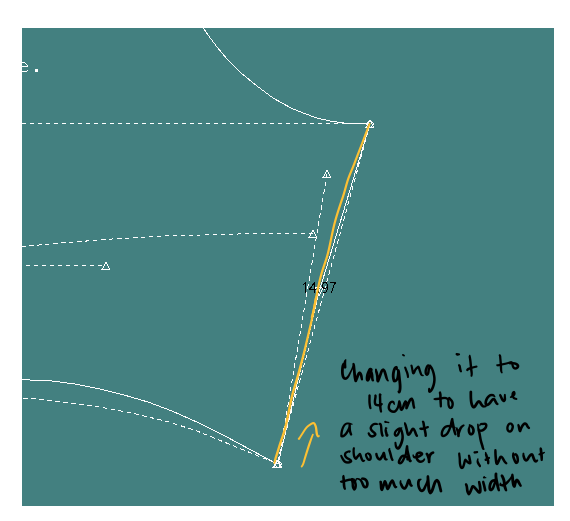
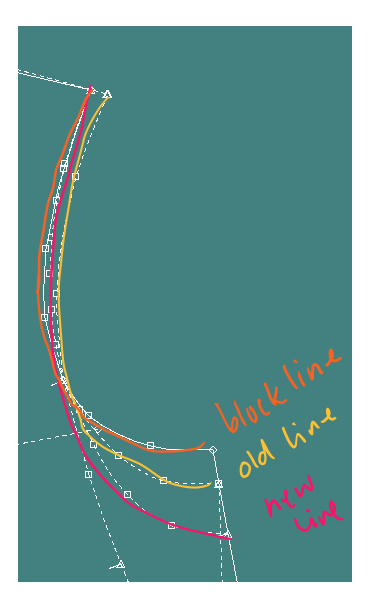
*Note: Ignore the yellow line as the old line was way down at the waistline.

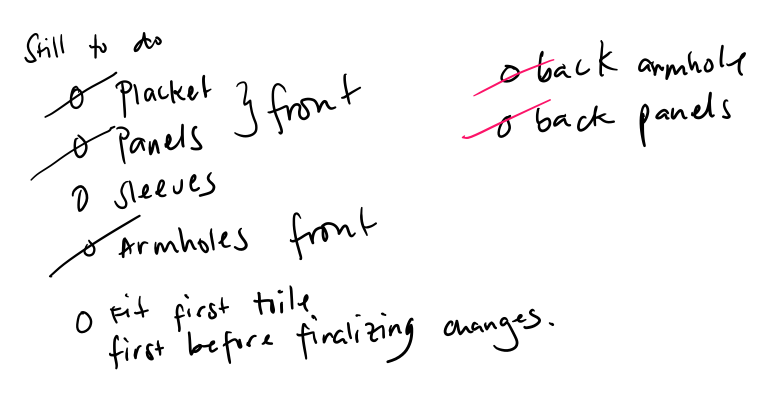
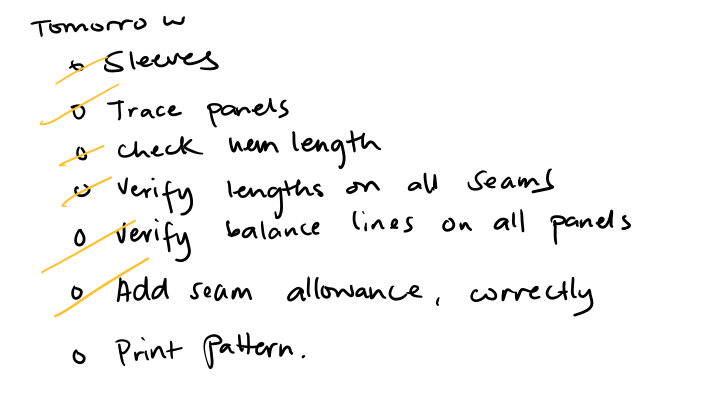
What my to do list for this task looks like:
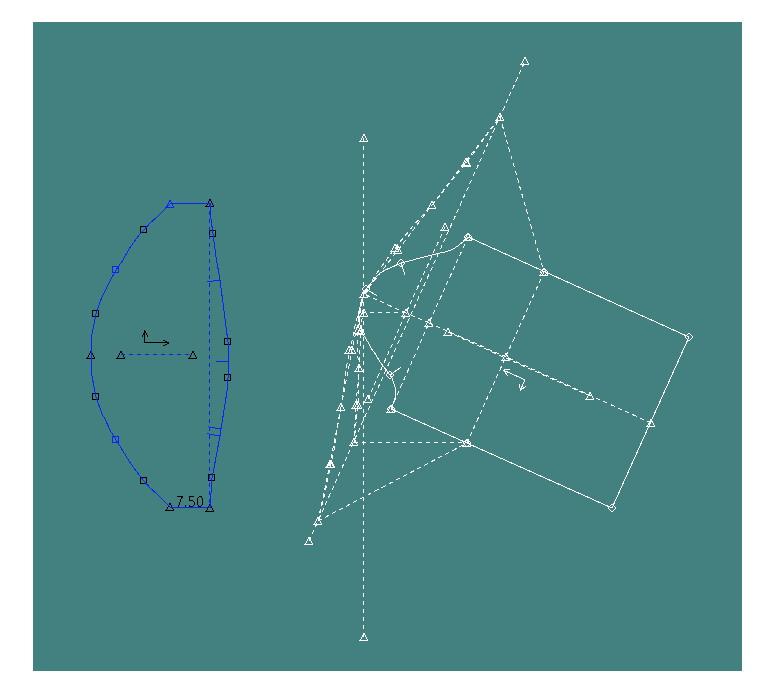
Sleeves were the biggest edit I did for this dress as the first one I did doesn’t even replicate the drawing at all. Angle is important in the design of the sleeve, so I began the iteration there. This dictated the height of the crown, which, as expected, is quite small as the angle is high up.
The shape took a while to pattern make. It took me a few tries, while looking at the cut from the toile to create the shape I wanted. As it is drafted flat and opened, and the toile is sewn in 3D form, I could barely imagined what the pattern actually looked like. (Next time, I am going to unpick the seams and open the sleeves to visualize the pattern.
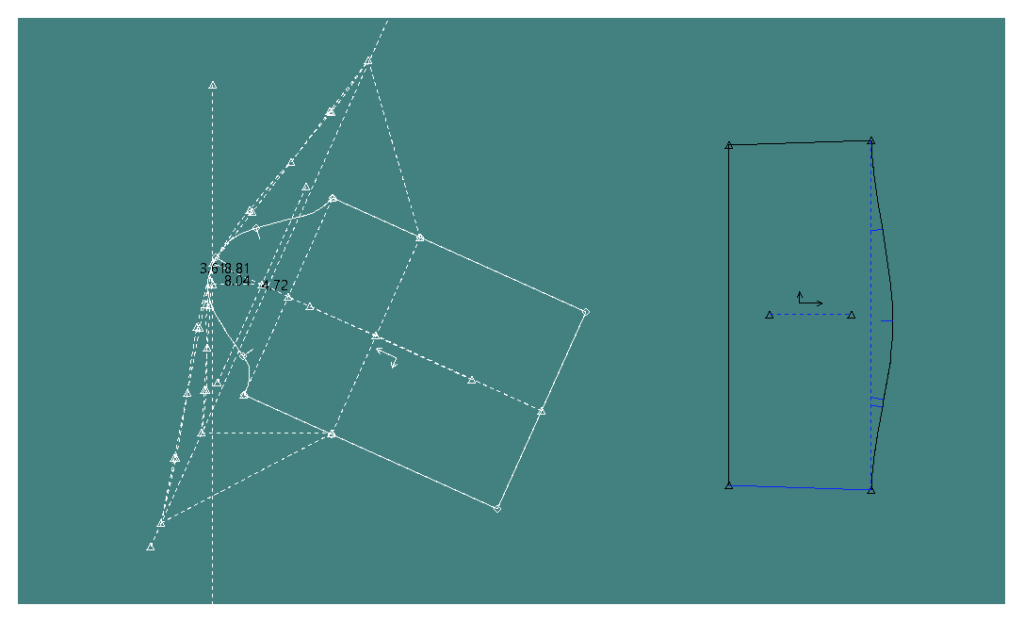
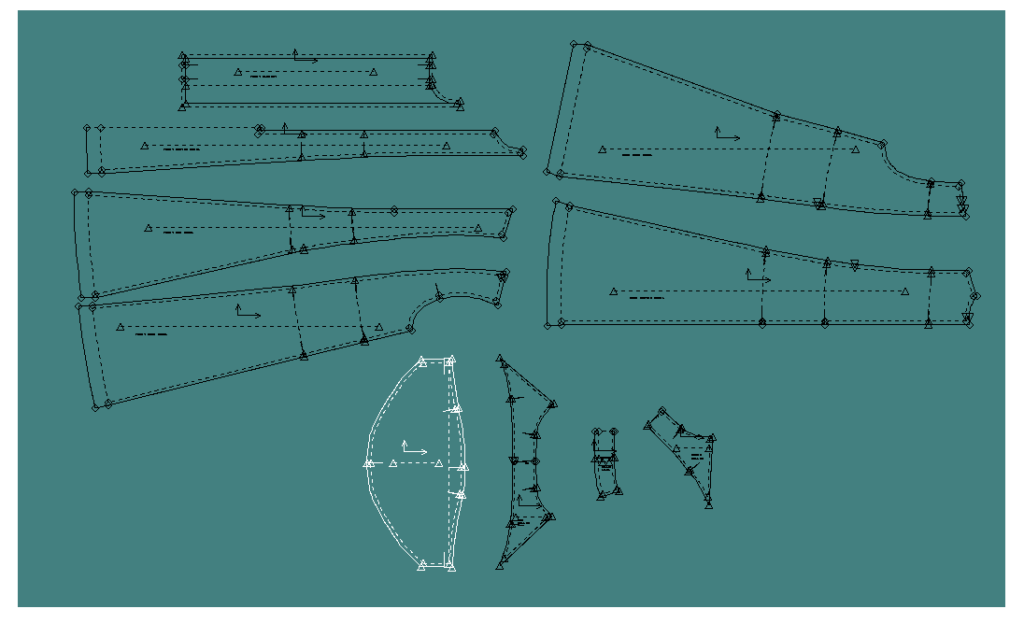
Final patterns of the 2nd drafted pattern:
2nd toile and notes
The second toile presented a much better proportions, sleeves and overall look of the Barong dress. While there are still some noted changes that needs to happen, these are just in the details.
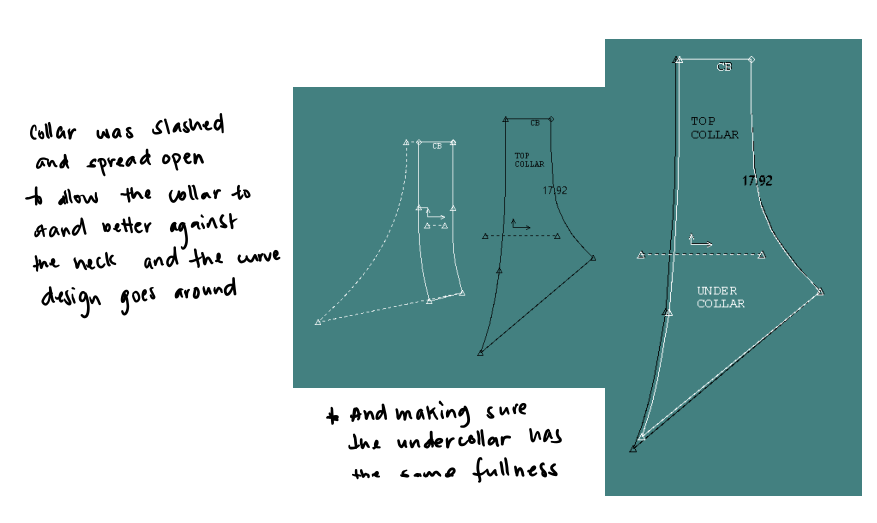
- The collar, as suggested by Robyn, to have the stand end at the original center front of the garment. That is to stabilize the corner where the placket and the collar meets. A gap will still be shown, but smaller as oppose to the original patterns. A gap is ideal for the design to emulate the typical mandarin collar on some Barong shirts.
- Placket needs to just adjust and have a better construction sequence as there is a part on the placket that isn’t enclosed by the collar. Robyn also suggested a method, which will be toiled as a sample.
- Neckline seemed to have gotten higher, a little change needs to happen here.
- A little more drop on the armscye is preferred. It has a casual feel to it that I prefer for this shirt dress. Most Barongs are worn in special events, as a uniform or business attire and this particular design is more everyday casual or street vibe.
- I wanted to try the sleeve with an coconut fabric interfacing that is stiff. May be able to help with the shape, but may be too stiff. Can only try, right?
- Need to still finesse the whole pattern as this will be my final pattern to submit.
- Remember to note sequence of construction for specification pack.
No Comments