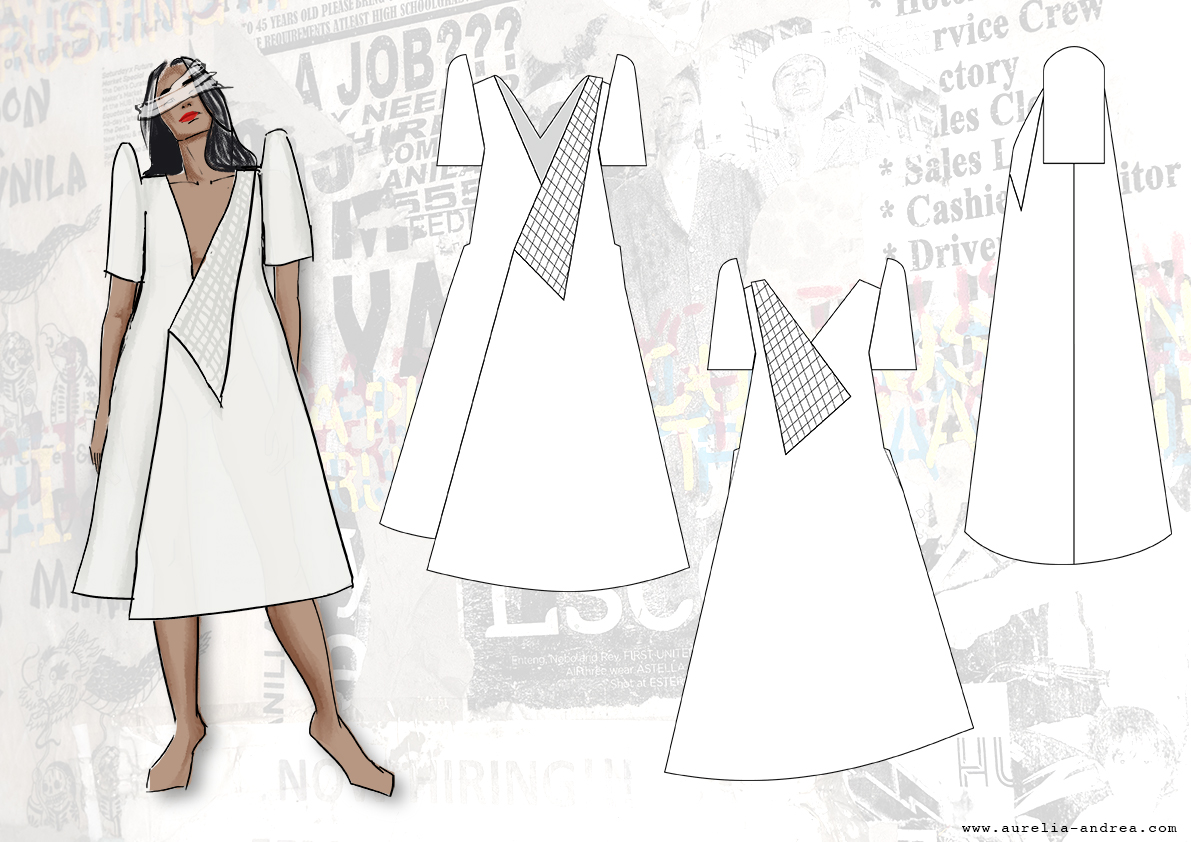
Making the Terno Dress
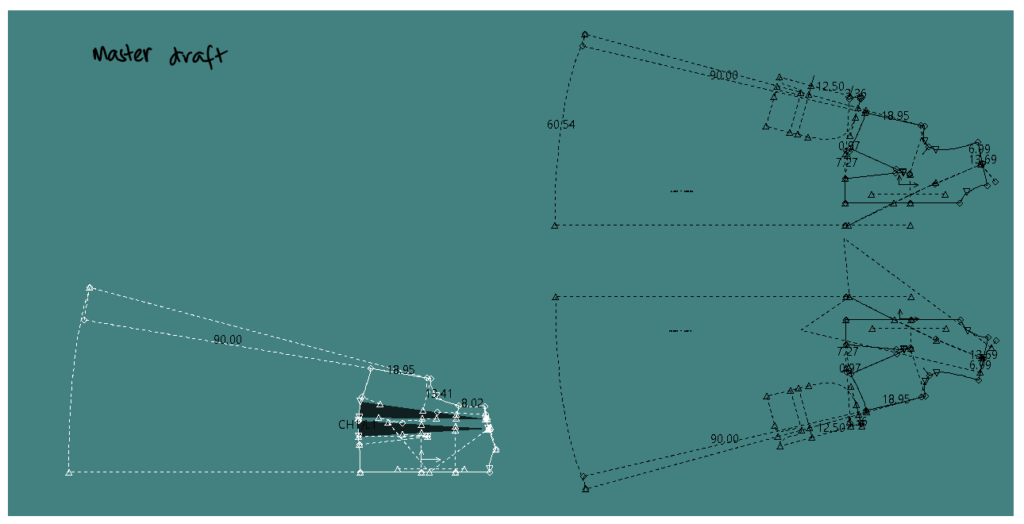
The first mentoring session, I knew I needed to ask about the lineup and improve it a little bit. I took Sue’s suggestion to lengthen the dress and make it a maxi length to create drama. Who knew adding a few more centimeters can change the look of a garment. (I always forget this sort of iteration where I can simply change one little detail of the garment). The pattern making began with these suggestion in mind. The length was added with what I think is enough length for an average tall person. However, I expect changes.
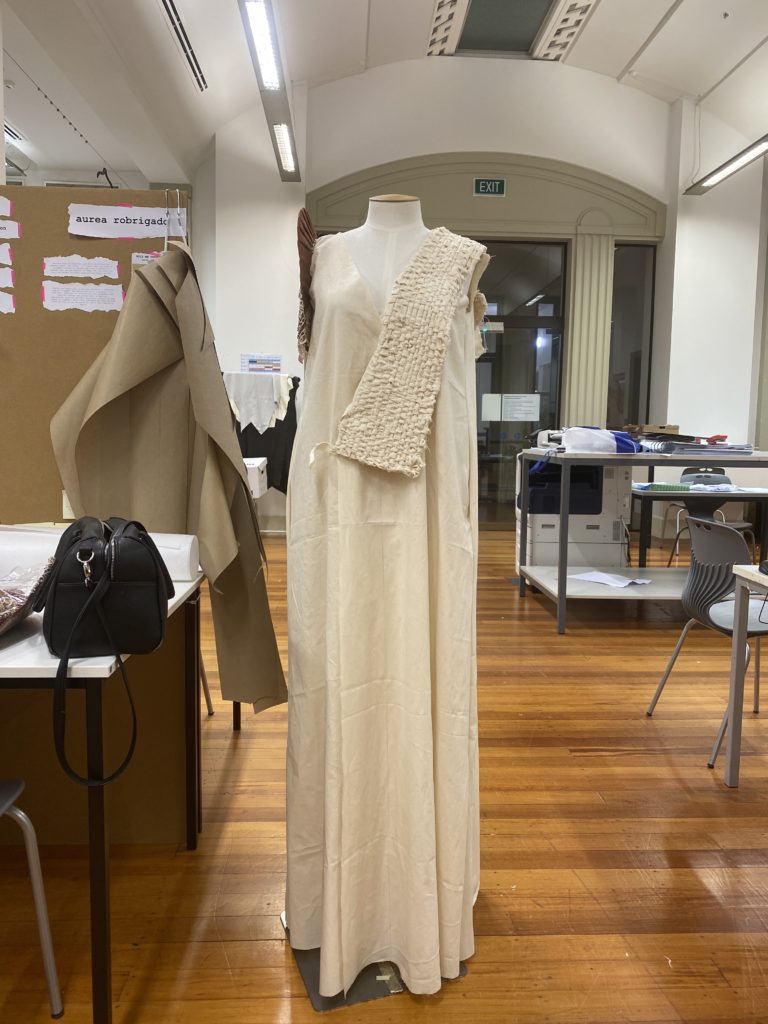
Making the pattern for this dress was straight forward. I hid all the darts in the bottom flare and added more. I wanted a generous amount of volume to the hem.
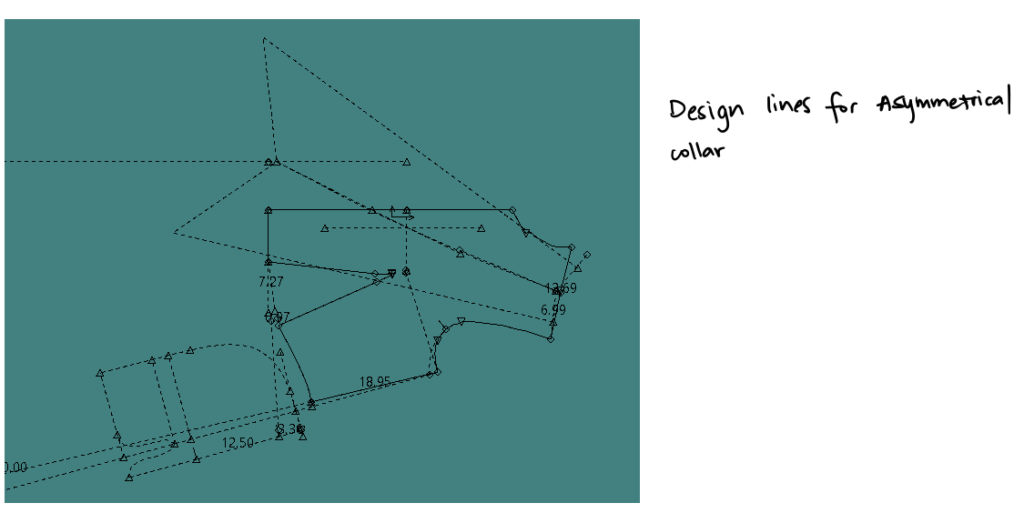
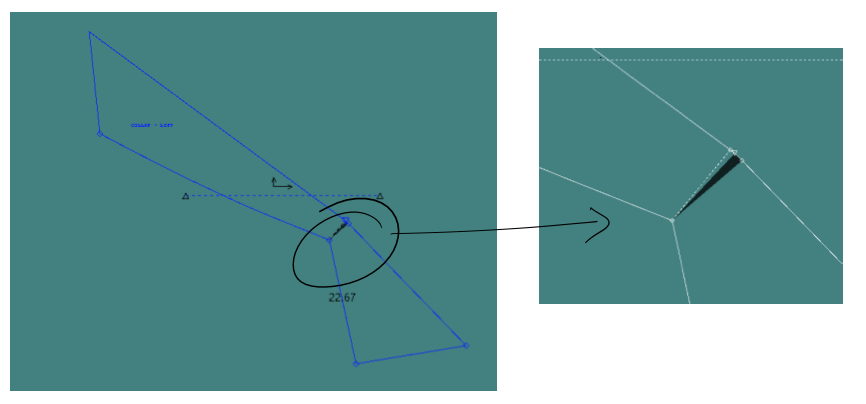
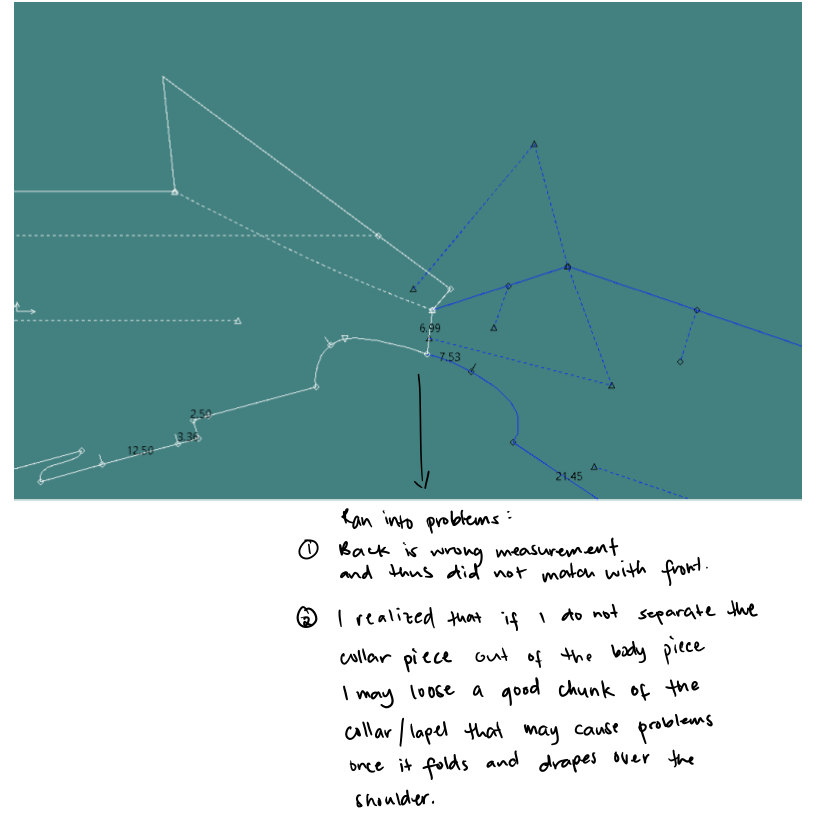
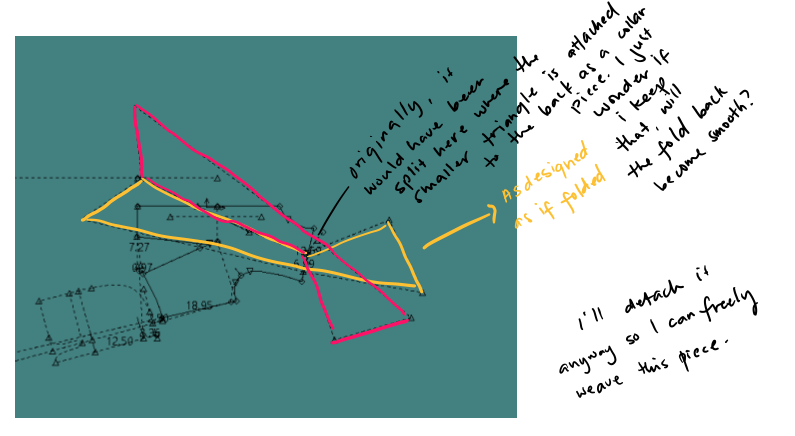
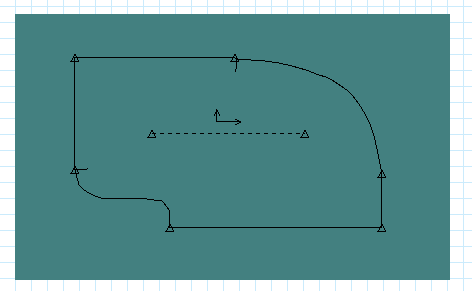
The collar/lapel piece will help determine the weaving length and width that will go on top of it. It may also serve as facing if needed.
Sleeve measurements taken for the terno sleeve pattern making.
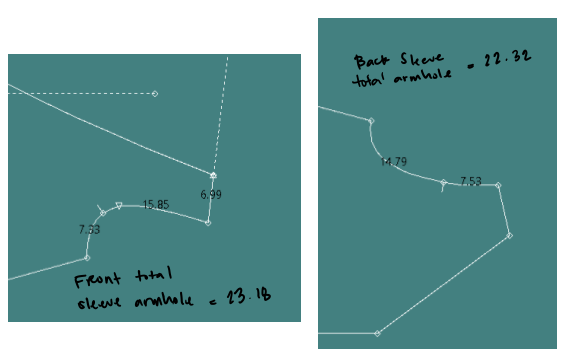
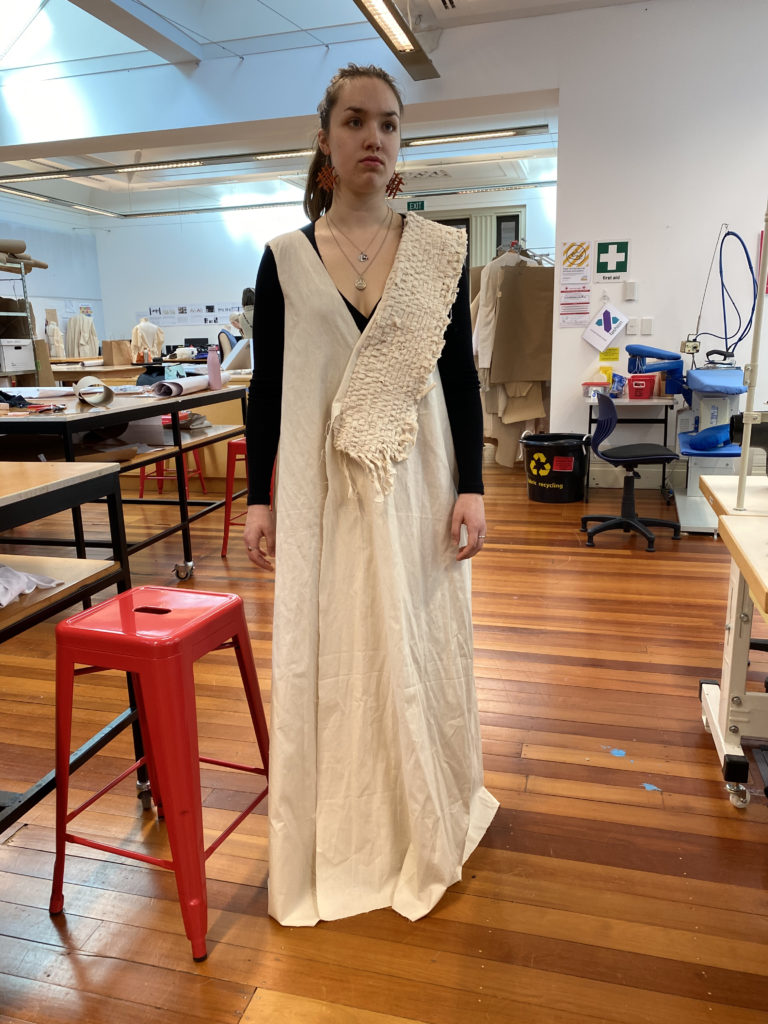
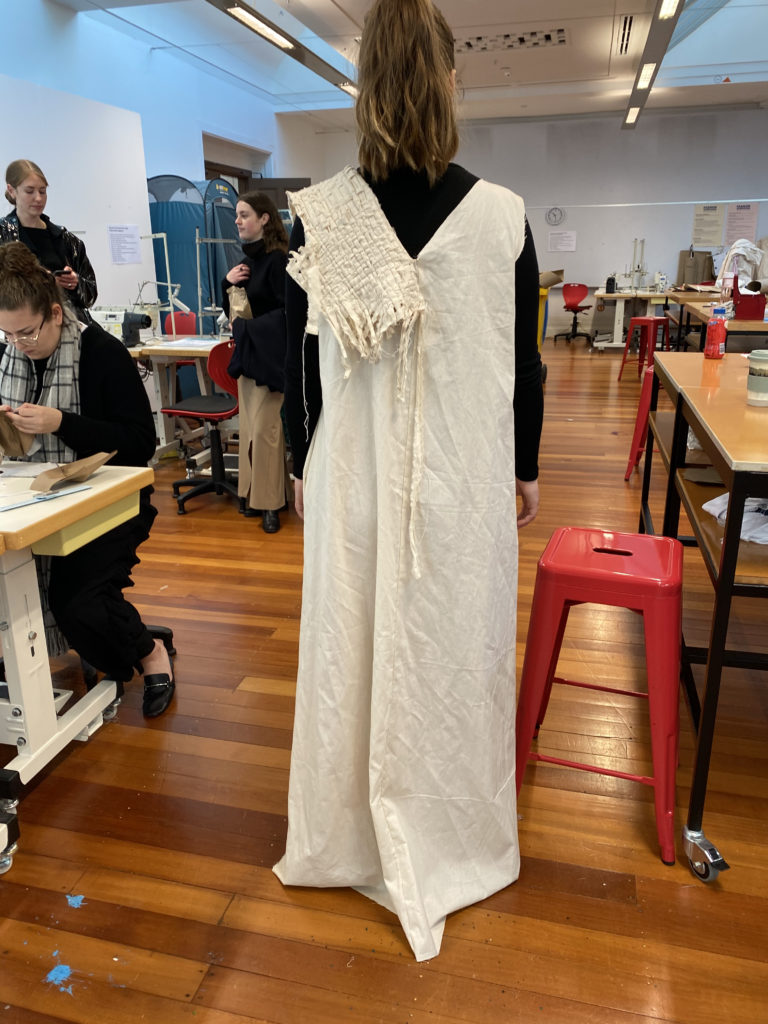
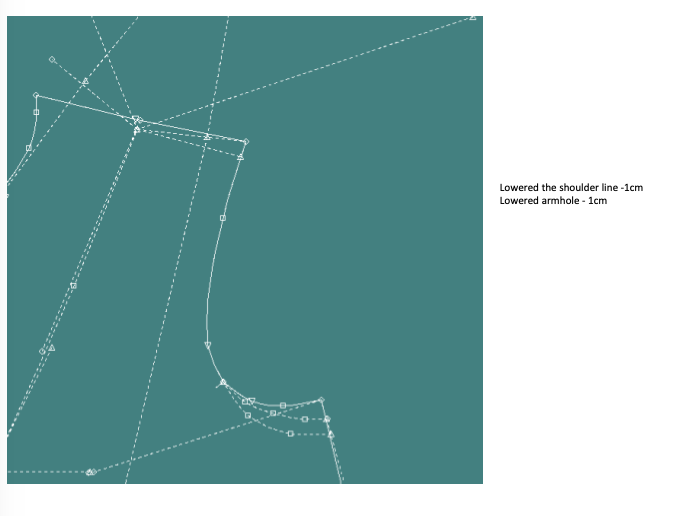
Some adjustments were needed, particularly at the sleeve. I need to lower it to make it comfortable. (Spoiler alert: I’m glad I did.)
pre-final garment changes
Finalizing the Patterns
I didn’t change the patterns too much as the first toile worked out well. Fit was good, which I’m glad. While, I did think the length was a little too long, I think, given the change, I would have had it as it was in the first draft. Having it drape on the floor made for a more dramatic effect. The final ended up having a shorter length.


Making the pocket
It can not be a modern dress if it doesn’t have pockets. It’s just necessary feature. I had to add it. I designed the pocket based on the Pattern making book by Armstrong. It’s the best way I know how to. As I followed it, the pockets had grown on facing at the front and back pattern pieces. However, I decided to remove it as the pocket will be cut from the main fabric anyway. You”ll see these changes in the following photos.
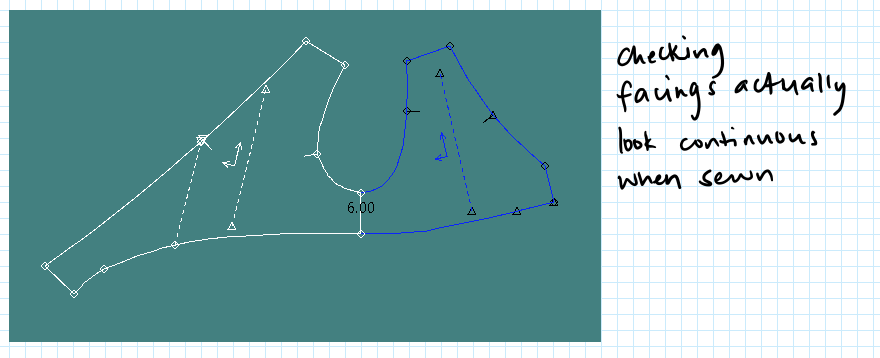
Making the facing
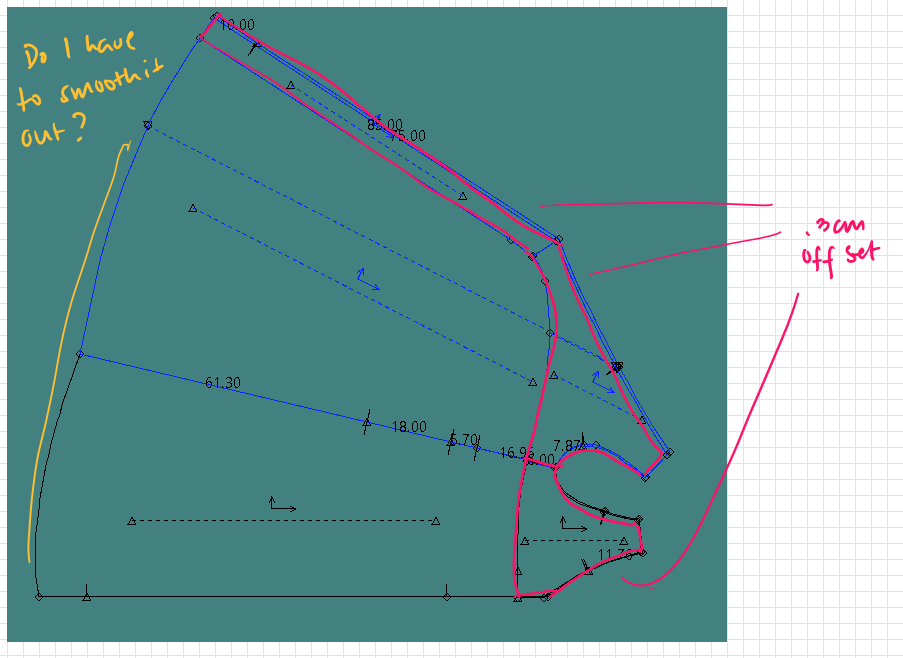
This will perhaps be the first time I will make a facing on my own. I don’t think I’ve ever done facings before. Linings, yes. But not so much facings. I opted for about 5cm facing (did this, cut the fabric before I received feedback to make my facings 6cm). At first I thought I had to straighten the strip of facing by making the sides parallel to grainline. But I researched this before I committed. Unfortunately, I don’t have the source I got the information to just have the facing as it is on the pattern. So I changed it and did not touch the grainline anymore.

Lay Planning
I did a quick lay plan for this so I know how much fabric I should buy. I am using the same fabric for all my white garments so I needed to buy just enough as I can not afford to have too much. I first planned for a 119cm wide fabric, then found the one I used as my final one, which was 142cm wide. So did my lay plan twice. The reason I used Adobe Illustrator is its ease of use and convenience for me. I am very familiar with the program. For what I need to do, it’s an easier and faster method for me.


Cleaning pattern lines
This is the part of the process where I was going through repetitive actions and I was getting overwhelmed with the amount of work. For a bit of break from pattern making, I make the patterns look clean and tidy, then I’d transfer it to CLO3D and just play a bit. It’s unnecessary step, that probably was the reason I had to ask extension. But at the time, I needed something different to keep me going.
![]()
Unresolved problems
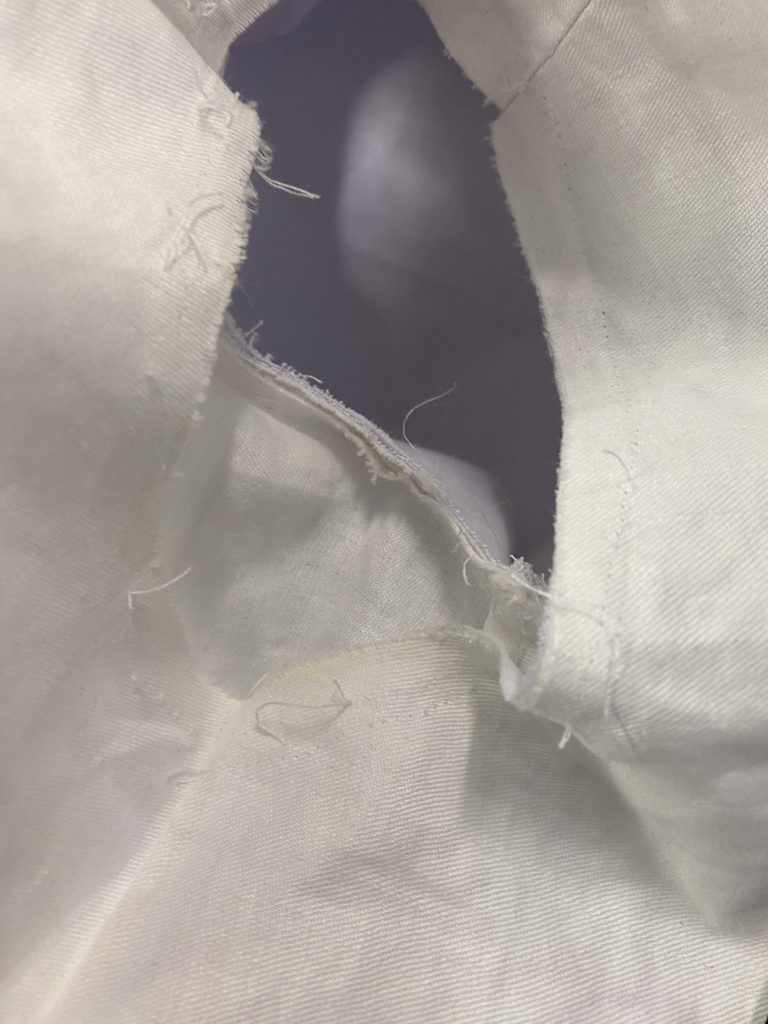
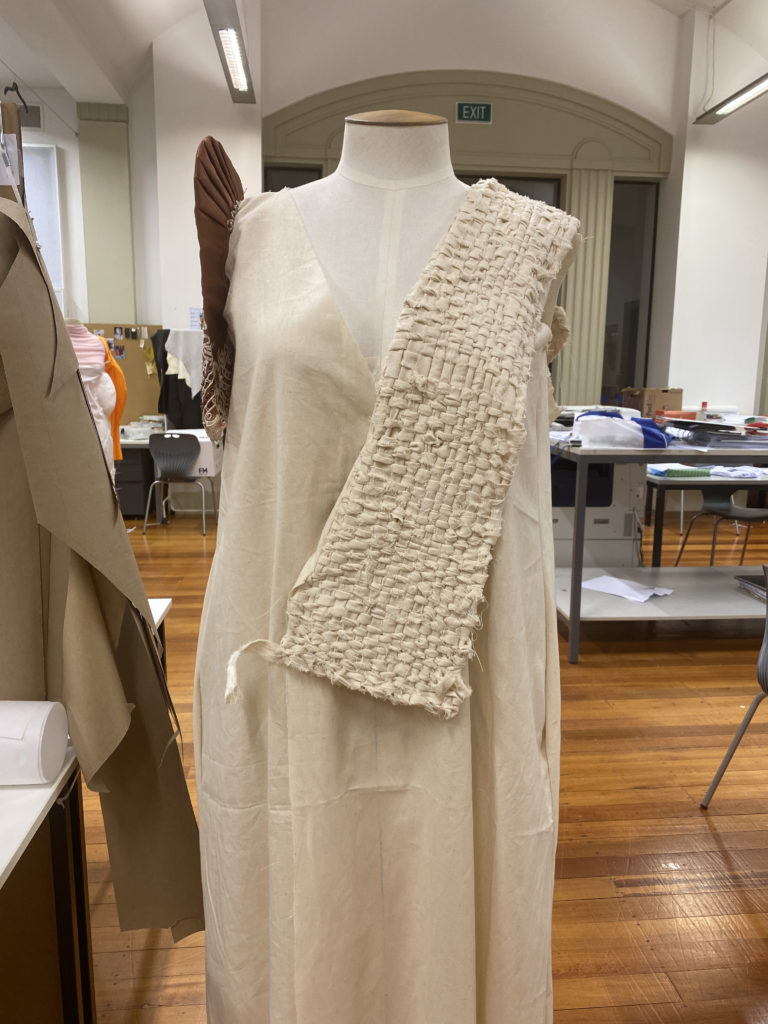
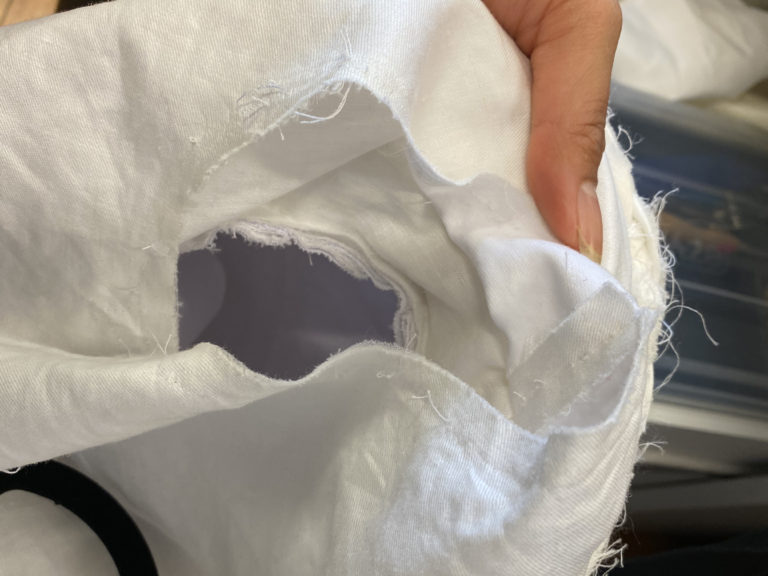
One of the last things I stitched was the Terno sleeve. It was so straightforward, yet so overwhelming at the same time. While the sleeve length worked out well to fit the arm whole of the dress, the facing didn’t. By this time, I had my photoshoot done, I had to have my garments ready for presentation. There was just not any time. There was barely any energy left and I had to make the decision that this garment will have to have a hanging facing at the arm hole. (I’m still meant to overlock that, woops). It just wouldn’t fit. My theory is, since the main garment isn’t fused, it retained its flexibility and stretch, especially with the curves. The facing, either shrunk in the heat or retained the scye length according to pattern and my calculations were wrong. It was heartbreaking to let an unresolved problem be seen and assessed, but I had to choose sanity. I can fix it after it’s graded, right?
Terno
Final Garment

Overall Thoughts…
Making the terno dress is an enjoyable process. I was able to do one toile and make it work the first time. Even after a little bit of changes without another toile, it has still worked out. Adding the terno sleeve was a whole new ball game, though and that presented different challenges. The fabric definitely put me off guard and I had to work with what I got. The cutting was what stressed me the most. In the end, I just had to make it work. If I ever re-do this piece, it will be done with a different fabric.
No Comments